This tutorial shows you how to create 3D objects with transparent areas. In this example I will warp a text layer around a sphere. Then I'll make the sphere transparent, except for the text.
1. Create a new document with a ratio of 2:1.
In this example I created a document of 1000px (width) by 500px (height).
2. Type in your text.
(In this example I entered: "HAVE A LOT OF FUN -" using Times New Roman 90pt)
3. Press Ctrl-A (PC) or cmd-A (Mac) to select all.
4. Select the MOVE tool (press the V key) and click the "Align Horizontal Centers" and "Align Vertical Centers" buttons, in the options bar, below Photoshop's menu.
5. Press Ctrl-D (PC) or cmd-D (Mac) to deselect.
6. Click on the "fx" button in the layers panel and select "Bevel & Emboss".
7. Click on the "Technique" drop down list and select "Chisel Hard". Set: Depth=100%, Size=60px.
8. Click on "Gradient Overlay", select GRADIENT: Spectrum and hit "OK"
9. Merge layers by pressing Shift-Ctrl-E (PC) or Shift-cmd-E (Mac).
10. Duplicate the image (select: Image > Duplicate) and name the new image as "transparency"
11. Convert the new image to GRAYSCALE (Image > Mode > Grayscale)
12. Press Ctrl-L (PC) or cmd-L (Mac) to open the Levels window.
Enter 0,01 in the midtones field: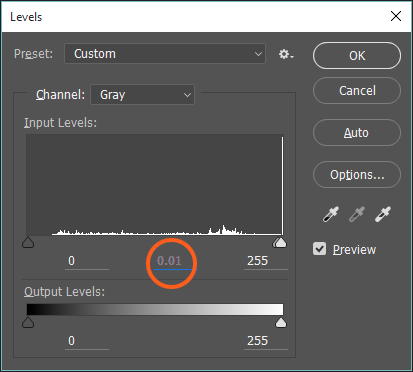
13. Press Ctrl+I (Mac: cmd+I) to invert the image.
Save the image in your hard disk (I prefer to save it as png, but you can choose jpg or tiff).
Close this image.
14. Now we will create a sphere from the image that is open in Photoshop (the one with the colored text).
- If you have Photoshop CC or CS6 Extended, select: 3D > New Mesh from Layer > Mesh Preset > Sphere from the menu.
- If you have Photoshop CS5 Extended select: 3D > New Shape from Layer > Sphere from the menu.
The image should now look like this (which actually looks not like anything new to you I think, but we will change it NOW!):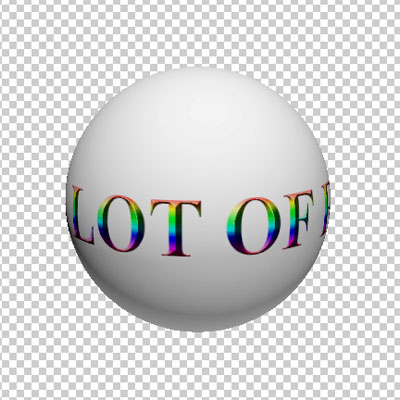
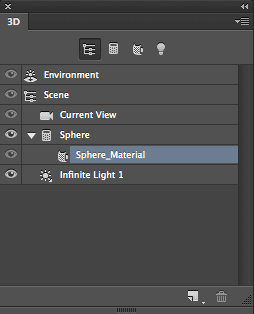
15. We will switch to the 3D panel: Please select Window > 3D from the main menu.
Once it shows up, click on "Sphere_Material". If it is not visible simply click on the small triangle to the left of "Sphere" and it will show up.
- If you have Photoshop CC or CS6 Extended the 3D panel should look like this:
- If you have Photoshop CS5 Extended the 3D panel should look like this:
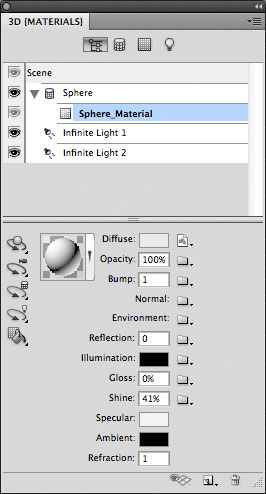
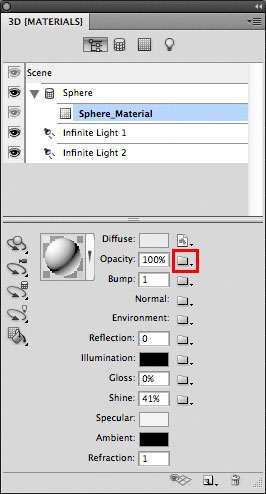
16. Now click on the small folder icon to the right of the Opacity field, which can be found in the Properties panel in Photoshop CC or CS6 Extended, and in the 3D panel in Photoshop CS5 Extended: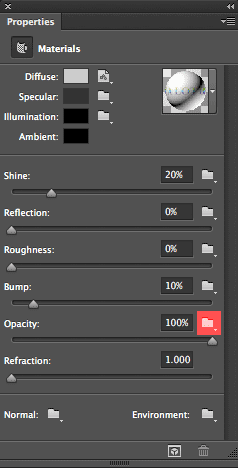
17. Select "Load Texture" and open the "transparency" image file you saved earlier on.
Your sphere should now look like this: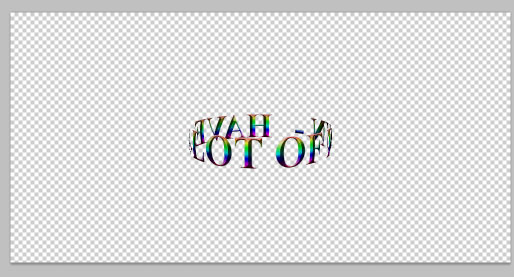
We are ready. Now you can animate the image using the Timeline panel (called "Animation panel" in older Photoshop versions).
TIP: In this tutorial I used only BLACK and WHITE in the "transparency" image, where black gives fully transparency while white gives full opacity. Working with different gray tones results in different transparency values.
Following these steps you can create a bunch of great 3D effects, like this one:
© Pit Hermann
