Understanding the Blend-If parameters
-
Photoshop CC, CSx
-
Easy

In this Photoshop tutorial you will explore the powerful but often overlooked advanced blending options in the Layer Styles window and learn to control pixel opacity based on brightness.
Open the image FULLMOON.JPG. From the menu select Select > All to select all pixels. Then select Edit > Copy to copy them into your clipboard. Close this image.
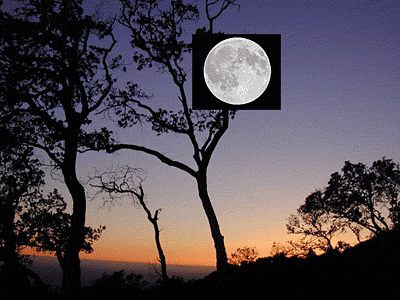
Now open the image SUNSET.JPG. Select Edit > Paste to paste the full moon image. Press V to select the move tool and drag to position the moon layer above the tree branches, as shown in the image below.

To remove the black background around the moon, we can create a circular selection with the elliptical marquee tool, inverse it, feather it, and delete it. But if we want the moon to appear behind the tree branches, we face a tougher task. Using a layer mask would be an option, but it could be labor-intensive. Fortunately, Photoshop offers a powerful and flexible feature.
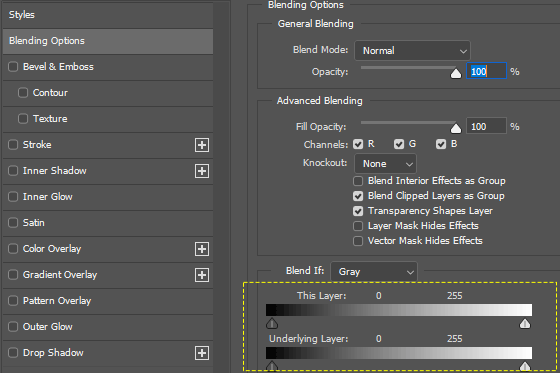
Select the Moon layer and double-click its thumbnail to open the Layer Styles window. In the BLEND IF section, you'll see two horizontal bars with black and white sliders beneath each. Let's explore this feature.
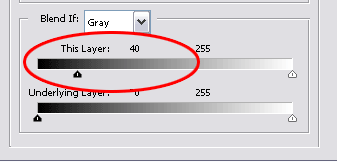
Drag to the right the black slider underneath the first bar of the Blend If section, until you read the tonal value of 40 (see the image below).

The black background around the moon has disappeared:

How did this happen? By dragging the black slider to the right, you instructed Photoshop to hide all active layer pixels darker than a value of 40. Likewise, moving the white slider to the left makes pixels lighter than a specific value disappear.
We've seen that the first bar offers advanced control over layer blending based on pixel brightness. Now, let's explore two more crucial aspects. Let's get back to work!
We want to make the moon appear behind the trees. In other words we want to bring forward the dark pixels of the underlying layer(s).
Drag the second bar's black slider to the right until it reaches a tonal value of 20. This will bring forward the darker pixels of the underlying layer, making the dark tree branches and leaves appear in front of the bright moon pixels.
Here's another important point to note: when you zoom in on the moon, you'll notice jagged edges around the trees (see image below):

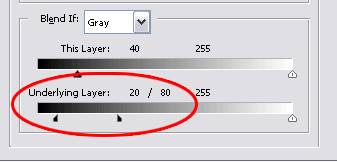
Let's discover why the sliders are divided into two parts. Hold down the Alt key (PC) or the Option key (Mac) and drag the second bar's black slider to the right. The slider will split into two parts. Drag it to the right until it reaches the value of 20/80 (see image below).

By specifying a tonal blending range for the transition from visible to non-visible pixels, you create a soft blending effect. This softens the tree edges, resulting in a natural overall effect:

Press V and drag the moon layer to move it to your preferred position:

If you reached this step, this means that you now know how the Blend If parameters work! This knowledge will prove very handy in the future!
Thank you.
Panos
