Understanding the Adaptive Wide Angle filter
-
Photoshop CC, CS6
-
Easy


At times, Photoshop's lens correction filter or Bridge features may fall short in correcting distortions from wide-angle or fisheye lenses. The Adaptive Wide Angle filter introduced in Photoshop CS6 is a useful and intuitive alternative. Let's explore how it works.
Click here to download the photo used in this tutorial:
Decompress the tutorial photo and load it in Photoshop.
Before editing your photo, ensure non-destructive editing by converting the background layer into a smart object. Simply right-click the background layer in the layers panel and choose 'Convert to Smart Object.' This preserves the original pixels within the smart object layer and allows you to apply the Adaptive Wide Angle filter as a 'smart filter.'
To access the filter, go to 'Filter > Adaptive Wide Angle' from the main menu. In the filter window, set the Correction mode to 'Perspective' in the upper right corner.
Use the constraint tools at the top left to draw lines or polygons for selectively straightening distorted areas in your photo:

On the upper right of the filter window, you'll find settings related to how Photoshop applies geometrical corrections. Photoshop will analyze the photo file and automatically choose the best correction type. Typically, the Auto mode works effectively. Below these settings, there's a preview window for precise constraint placement.
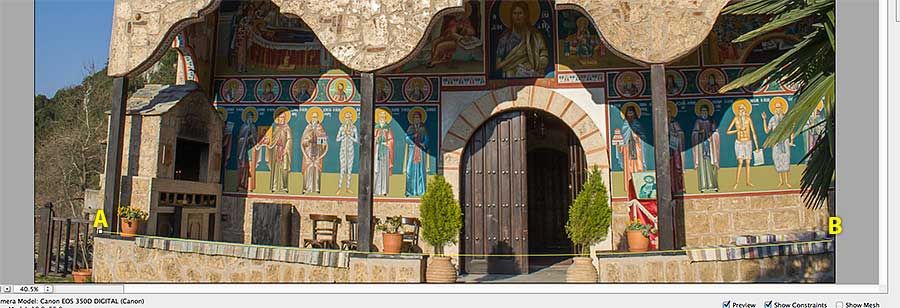
Click on the Constraint tool (the first tool at the top left) and draw a line from point A to point B:

This line is parallel to the floor, meaning it's horizontal. Right-click on the line and choose "horizontal" from the flyout menu to assign the horizontal attribute to this constraint:

Now draw a horizontal line from point A to point B, as shown below:

Right-click on the line and select "horizontal" from the flyout menu.
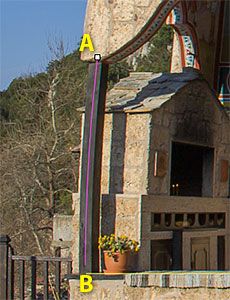
The wooden columns look curved. Draw a line from point A to point B, the way shown below, to straighten the left column:

Since the column is vertical, assign the vertical attribute to this constraint by right-clicking on the line and selecting 'Vertical' from the menu:

TIP: Holding down the Shift key while dragging will automatically assign the horizontal (or vertical) attribute to your constraint.
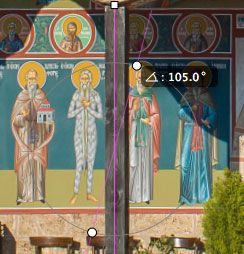
Now extend the constraint by clicking and dragging from point A to point B, to straighten the walls:

Repeat the same steps to straighten the other columns and the walls. If necessary click and rotate the marks on the circles to fine tune the constraints:

Click OK when finished.
Such distortion corrections create transparent areas along the edges of the photo. You can use the Content-Aware tools or the Generative Fill tool to fill these areas.
Here's a comparison of the photo before and after the Adaptive Wide Angle filter:


